flutterで開発をするためには、flutter SDK と開発環境(IDE)が必要です。 flutterが開発できるものは
- Android Studio
- Visual Studio Code
- Eclipse
などがあります。 今回はAndroid Studio を使って環境を作成します。
flutter開発環境の作成
必要なもの
- flutter SDK(インストールしたバージョンは、2.2.3 stable)
- Android Studio(インストールしたバージョンは、Arctic Fox|2020.3.1)
環境作成の流れ
flutter SDK をダウンロードして、インストールと環境設定を行います。
Android Studio をダウンロードして、インストールします。
flutterの開発に必要なプラグインを Android Studio にセットアップします。
環境作成の手順
flutter SDKのダウンロード
flutterのサイトからSDKをダウンロードします。
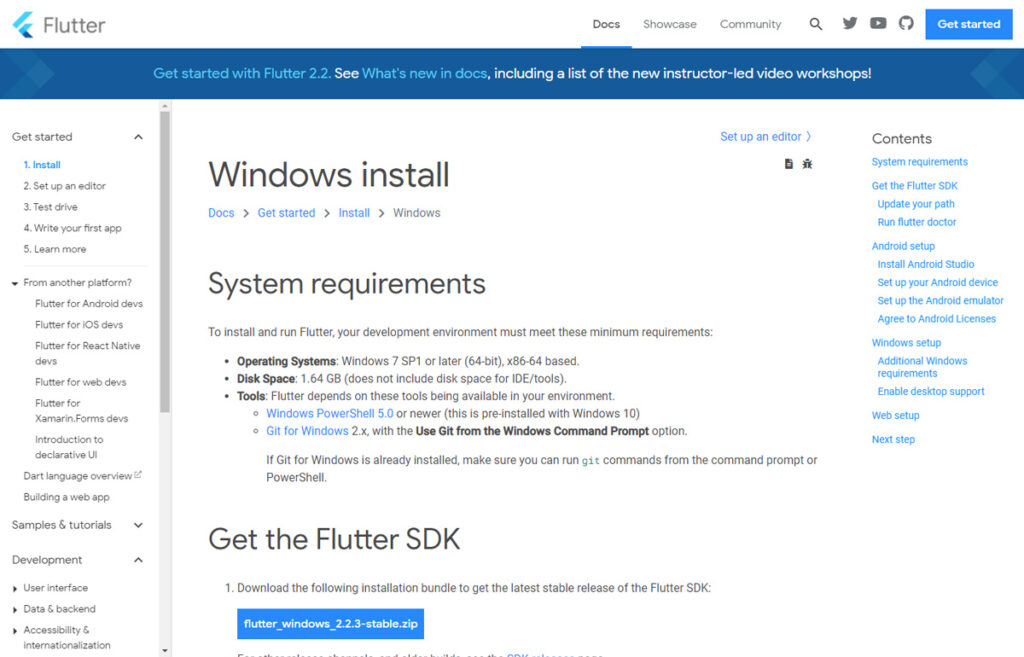
Program Filesのような特別な権限が必要なディレクトリにインストールするのはやめましょう!
ダウンロードしたzipファイルを展開します。
展開したフォルダの中にflutterフォルダがあるので、それをC:\に移動します。
これで C:\flutter 直下に配置することができました。
※残った「flutter_windows_2.2.3-stable」フォルダは不要ですので削除します。
環境変数の設定
C:\flutter\bin にパスを通してどこからでも実行できるように、環境変数を設定します。
手順
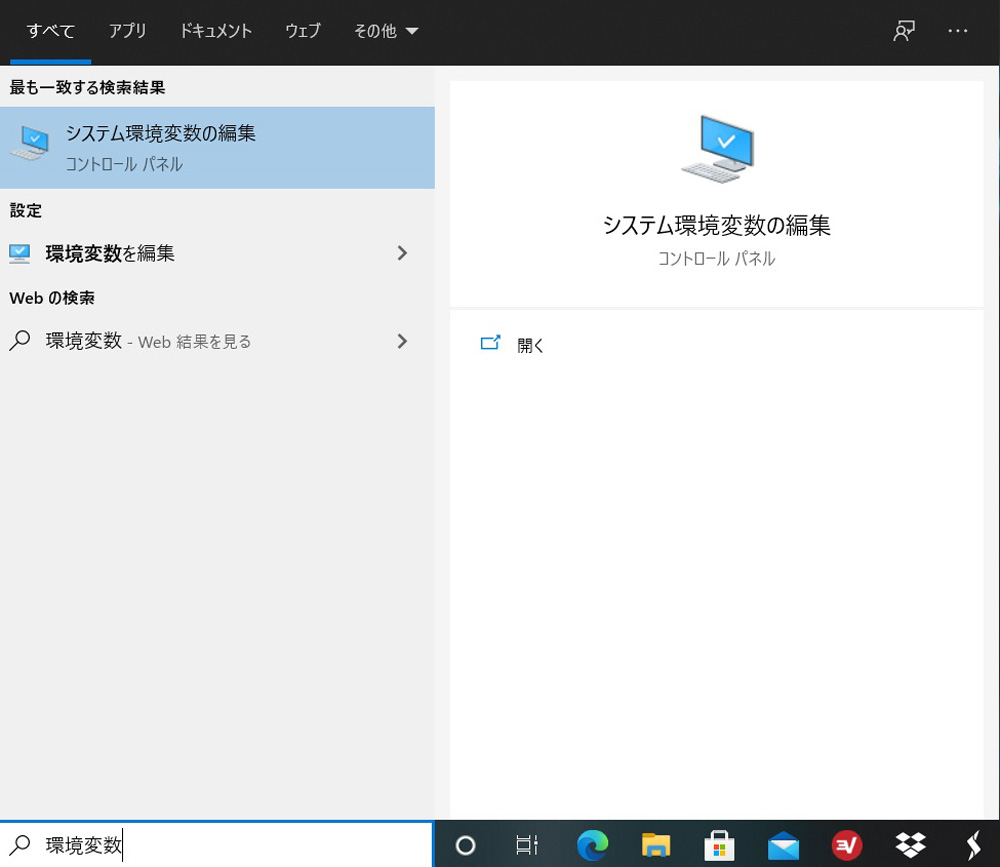
① windowsのスタートの隣の検索で「環境変数」と入力し、表示された「システム環境変数の編集」をクリックします
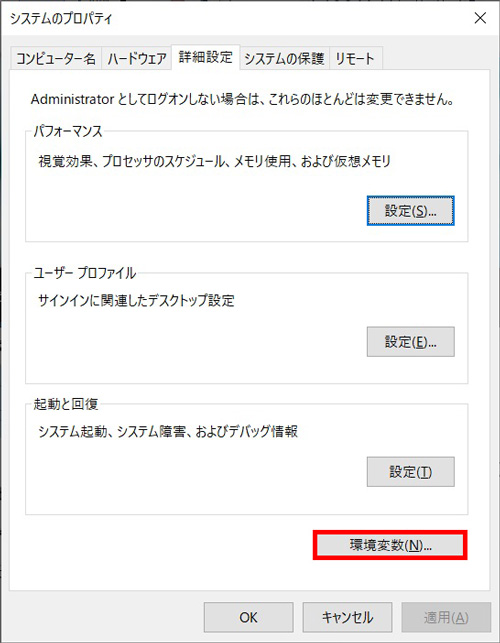
② システムのプロパティの環境変数をクリック
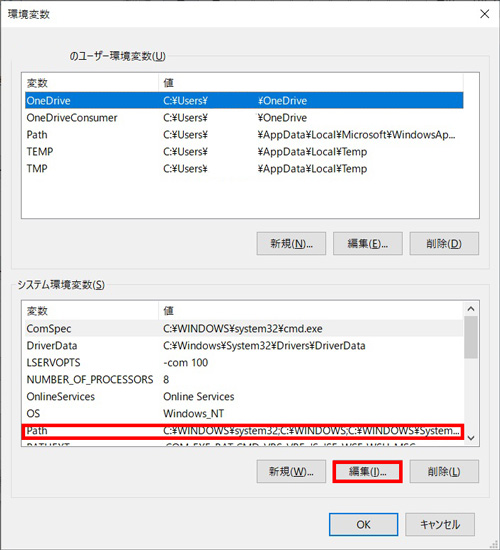
③ システム環境変数のPathを選択し、編集ボタンをクリック
④ 新規ボタンをクリックして、「c:\flutter\bin\」を追加して、以降OKをクリックしウィンドウを閉じます。
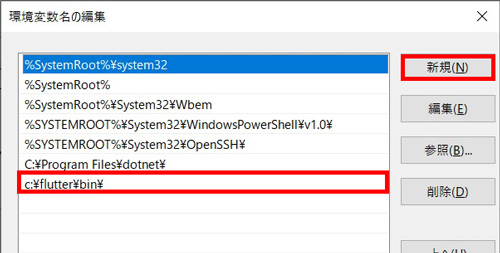
これでパスが登録されました。
flutter doctor で状態を確認
flutterには現在のFlutterの動作環境をチェックするツール(doctor)があります。
使い方は、コマンドプロンプトを起動し、flutter doctor コマンドを実行します。
>flutter doctor

  ╔════════════════════════════════════════════════════════════════════════════╗
  ║                 Welcome to Flutter! - https://flutter.dev                  ║
  ║                                                                            ║
  ║ The Flutter tool uses Google Analytics to anonymously report feature usage ║
  ║ statistics and basic crash reports. This data is used to help improve      ║
  ║ Flutter tools over time.                                                   ║
  ║                                                                            ║
  ║ Flutter tool analytics are not sent on the very first run. To disable      ║
  ║ reporting, type 'flutter config --no-analytics'. To display the current    ║
  ║ setting, type 'flutter config'. If you opt out of analytics, an opt-out    ║
  ║ event will be sent, and then no further information will be sent by the    ║
  ║ Flutter tool.                                                              ║
  ║                                                                            ║
  ║ By downloading the Flutter SDK, you agree to the Google Terms of Service.  ║
  ║ Note: The Google Privacy Policy describes how data is handled in this      ║
  ║ service.                                                                   ║
  ║                                                                            ║
  ║ Moreover, Flutter includes the Dart SDK, which may send usage metrics and  ║
  ║ crash reports to Google.                                                   ║
  ║                                                                            ║
  ║ Read about data we send with crash reports:                                ║
  ║ https://flutter.dev/docs/reference/crash-reporting                         ║
  ║                                                                            ║
  ║ See Google's privacy policy:                                               ║
  ║ https://policies.google.com/privacy                                        ║
  ╚════════════════════════════════════════════════════════════════════════════╝


Running "flutter pub get" in flutter_tools...                      10.4s
Doctor summary (to see all details, run flutter doctor -v):
[√] Flutter (Channel stable, 2.2.3, on Microsoft Windows [Version 10.0.19042.1110], locale ja-JP)
[X] Android toolchain - develop for Android devices
    X Unable to locate Android SDK.
      Install Android Studio from: https://developer.android.com/studio/index.html
      On first launch it will assist you in installing the Android SDK components.
      (or visit https://flutter.dev/docs/get-started/install/windows#android-setup for detailed instructions).
      If the Android SDK has been installed to a custom location, please use
      `flutter config --android-sdk` to update to that location.

[√] Chrome - develop for the web
[!] Android Studio (not installed)
[√] Connected device (2 available)

! Doctor found issues in 2 categories.
✓がついているものは正常。それ以外は何か原因があって対応されていないものです。
上記のログからは、Android toolchainとAndroid Studioが完了していませんが、これらは以降の作業で対応するので、いまはこのままでOKです。
Android Studio インストール
developersからAndroidStudioをダウンロードします。
AndroidStudio ダウンロード
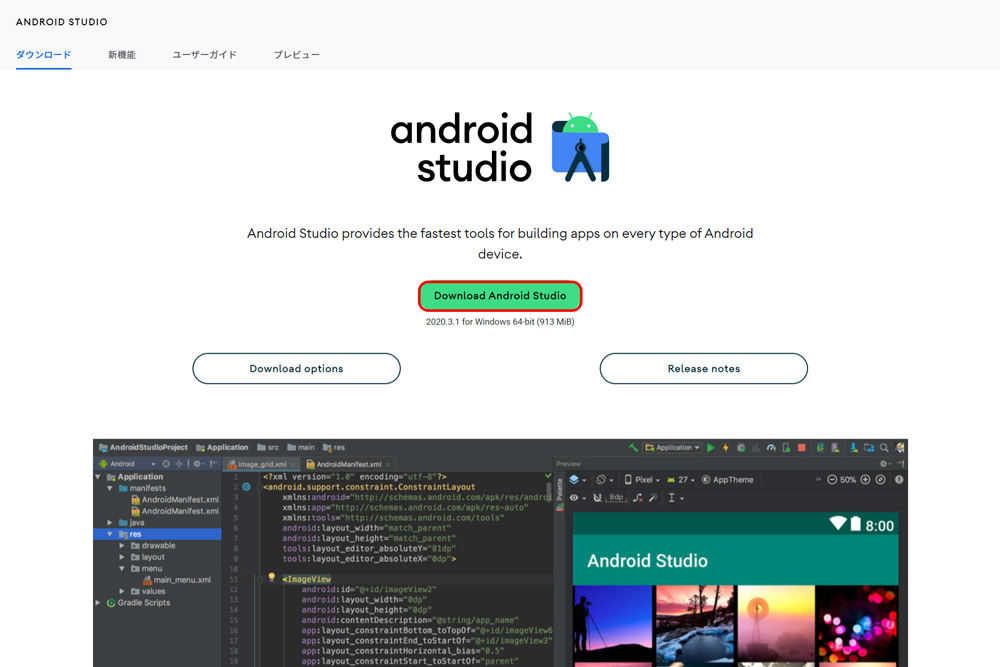
① developer からダウンロードを選択すると、AndroidStudioをダウンロードするためのリンクが表示されます。 Download Android Studio をクリックします。
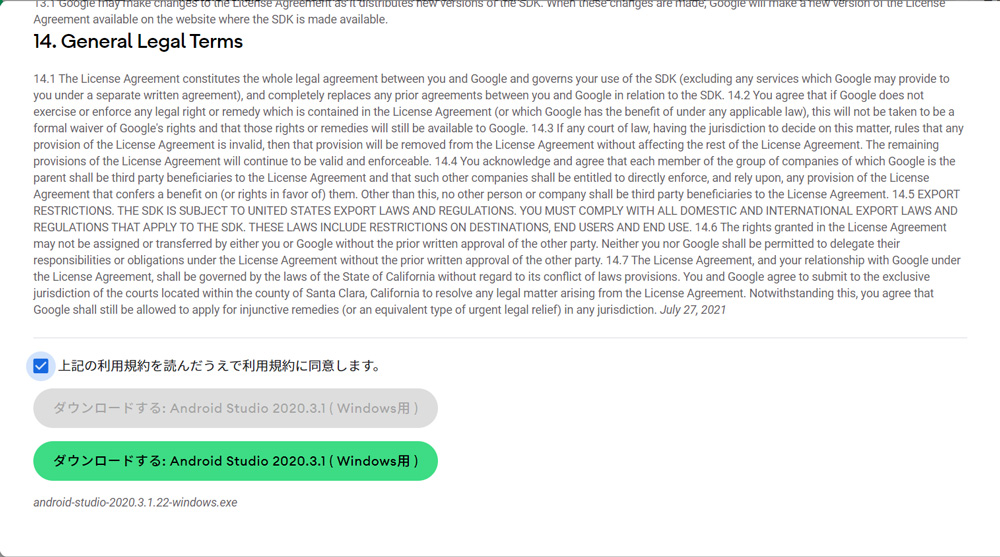
② 利用規約が表示されるので、下までスクロールして同意チェックを入れてダウンロードするをクリックして、ファイルをダウンロードします。
AndroidStudio インストール
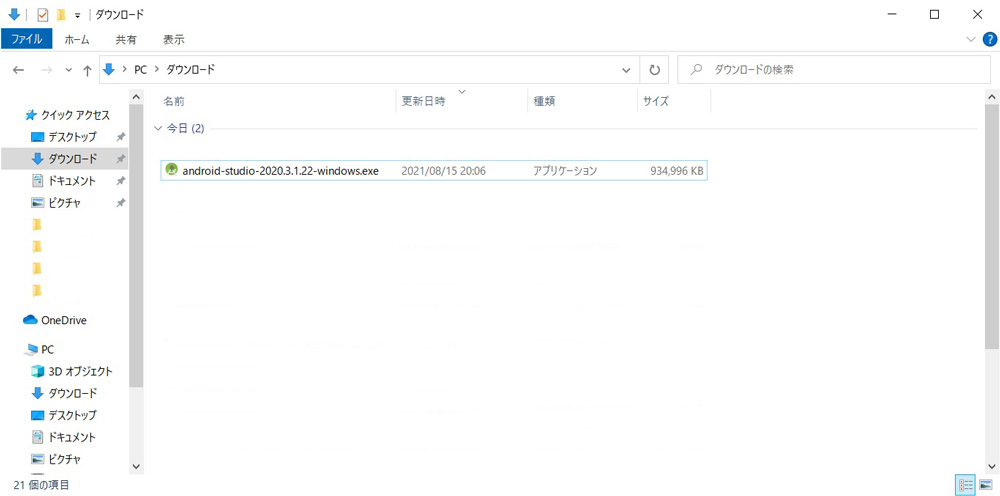
① ダウンロードしたファイルを実行します。
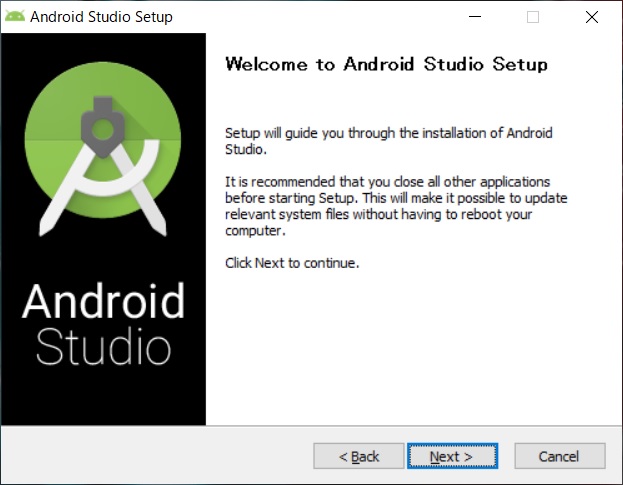
② セットアップ画面が表示されるので Next をクリック。
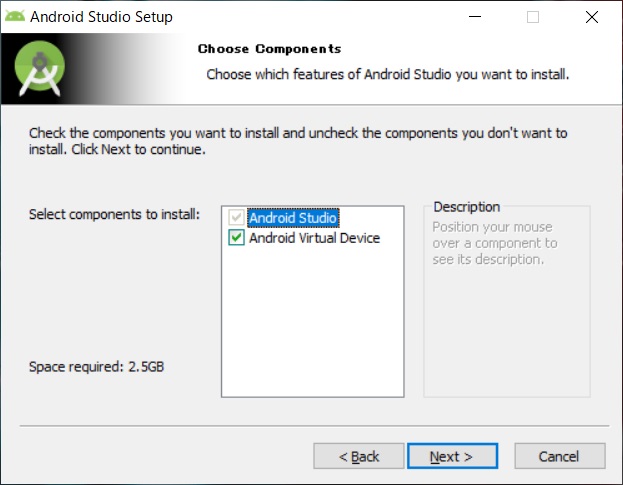
③ コンポーネントの選択。 Next をクリック。
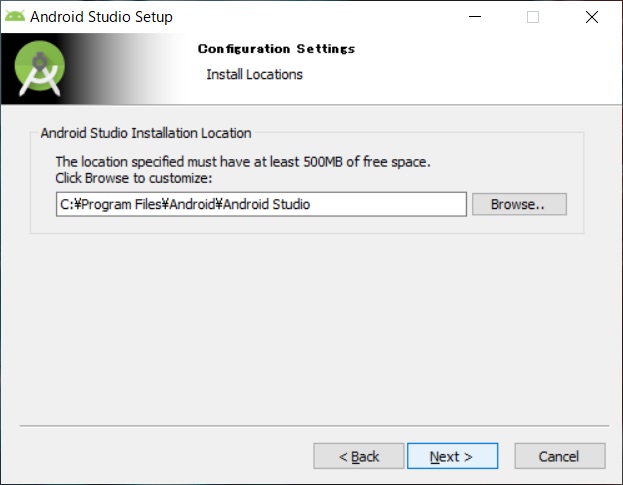
④ インストール先を設定します。 問題がなければそのまま Next をクリック。
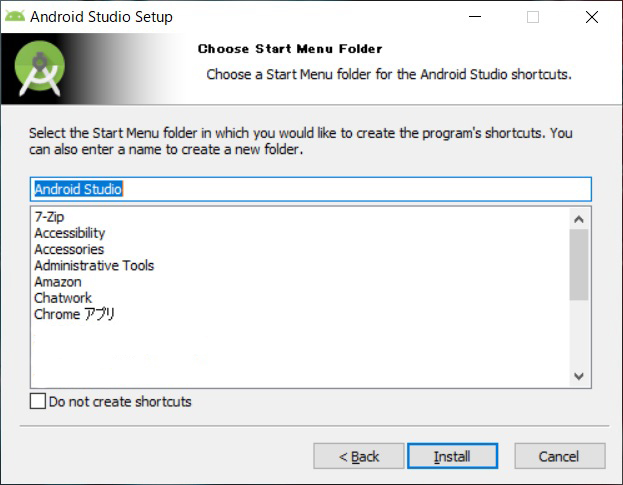
⑤ スタートメニューの設定です。 問題がなければそのまま Install をクリック。
⑥ インストールが開始されて、インジケーターで進み具合がわかります。 インストールの最中に管理者への確認ダイアログが表示されるため、許可をしましょう。
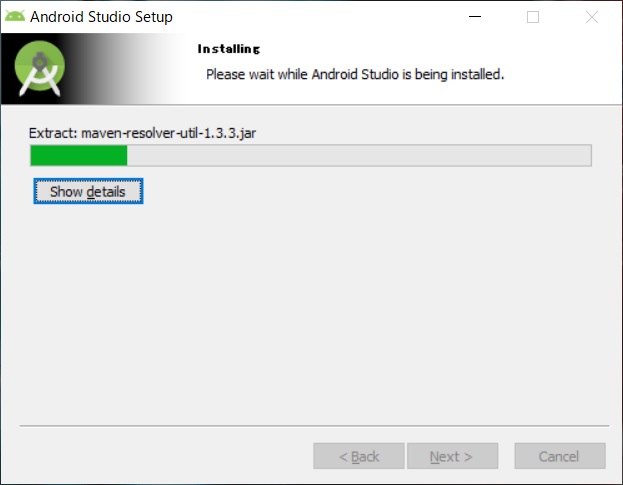
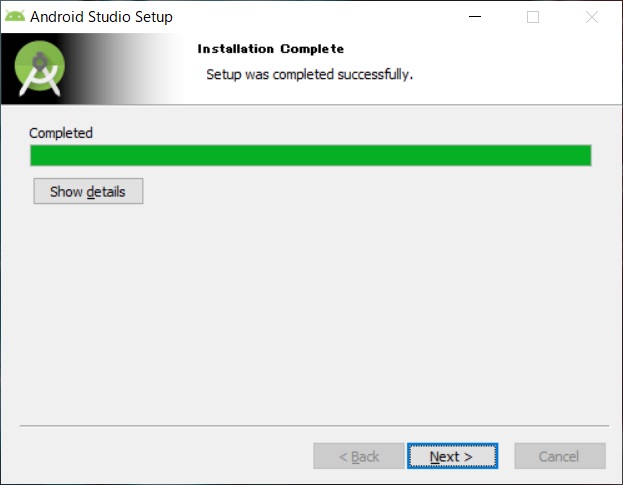
⑦ インストールが完了しました。 Next をクリック。
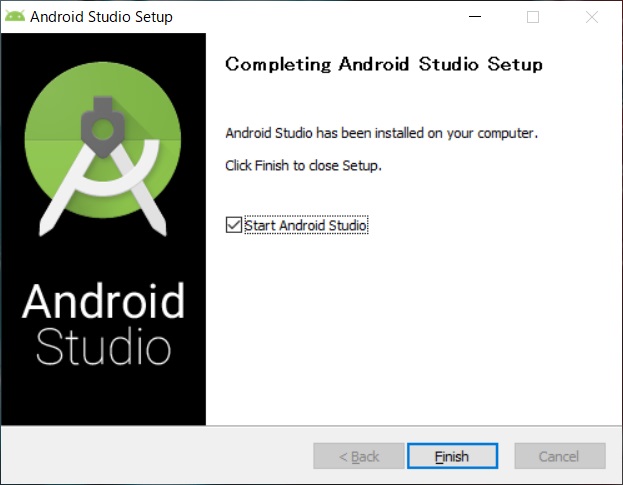
⑧ Finish をクリックして、セットアップを行いましょう。
AndroidStuio セットアップ
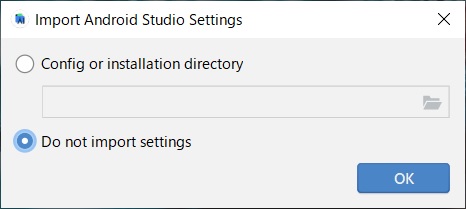
① Android Studioの設定があれば選択することができます。 必要なければ、そのまま OK をクリック。
② データの共有 ダイアログが表示されます。 Android Studioの動作状況などのデータが収集されるようです。 Android Studioの改善に協力するには Send usage statistics to Google を 今回は協力を辞退するなら Don’t send をクリックします。
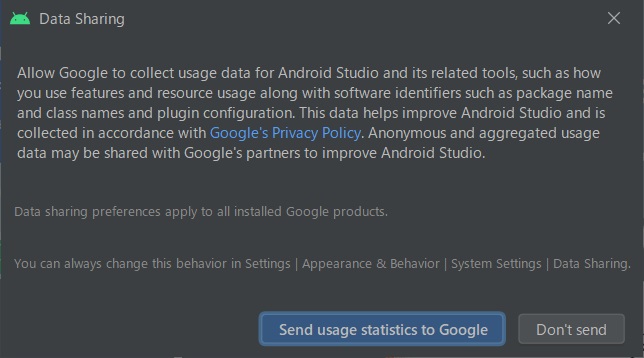
Googleが、Android Studioとその関連ツールの使用状況データ(機能の使用方法やリソースの使用状況など)と、パッケージ名やクラス名、プラグイン構成などのソフトウェア識別子を収集できるようにします。 このデータはAndroidStudioの改善に役立ち、Googleのプライバシーポリシーに従って収集されます。 匿名の集計された使用状況データは、Android Studioを改善するために、Googleのパターンと共有される場合があります。
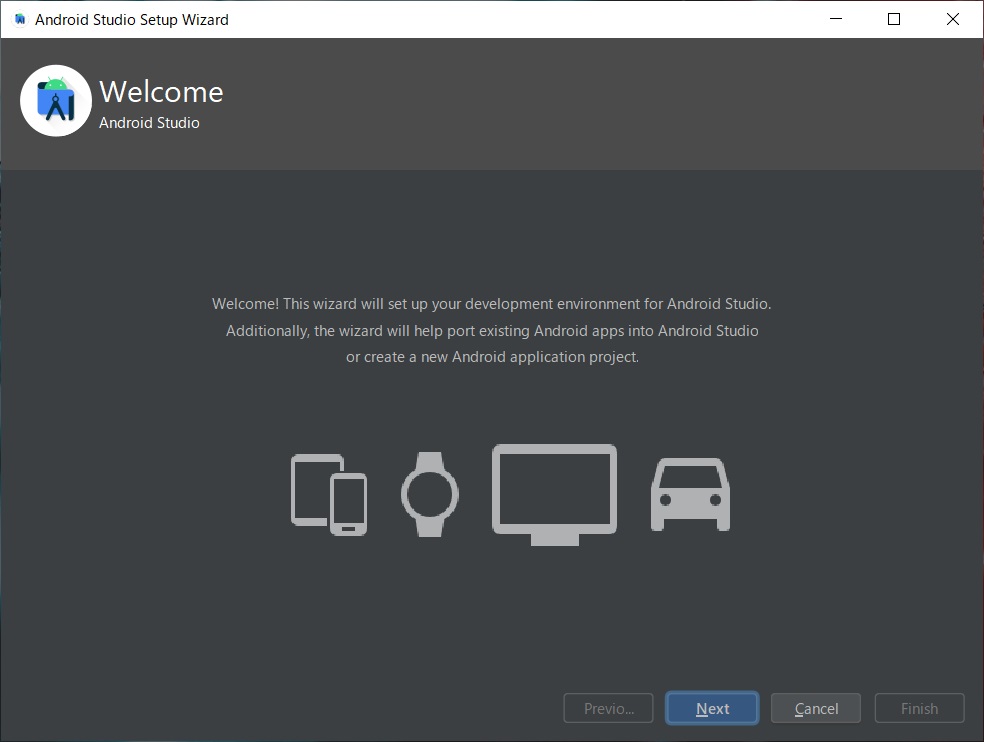
③ Android Studio のWelcome画面が表示されるので、 Next をクリック。
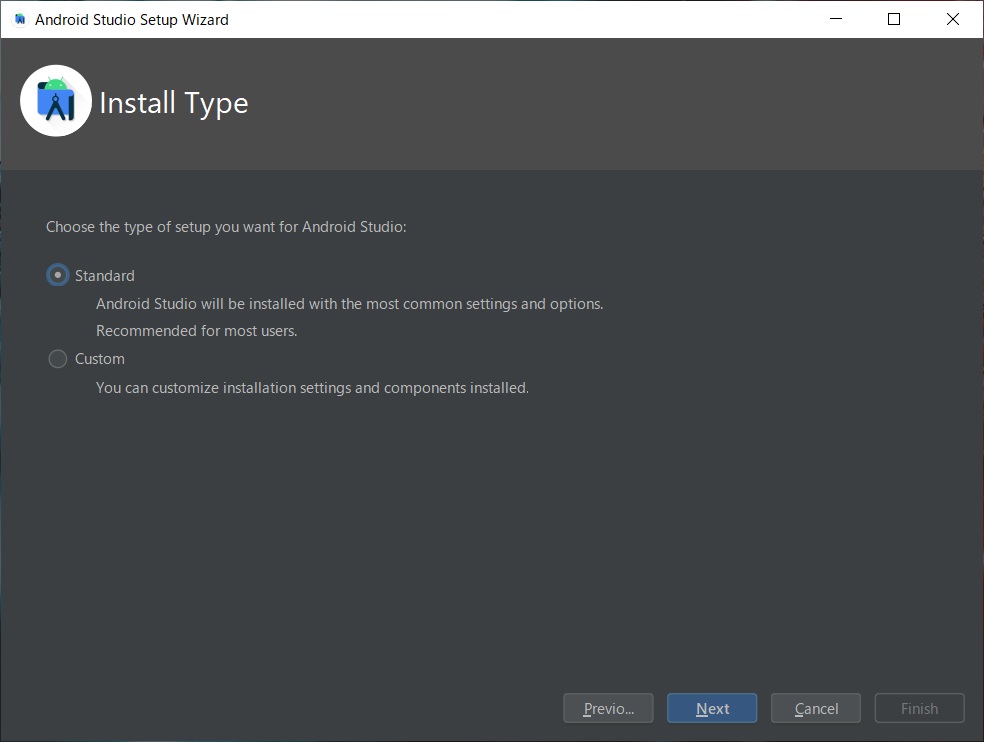
④ インストールの設定をカスタマイズするには、 Custom を、標準の設定を適用するのであれば Standard をクリック。
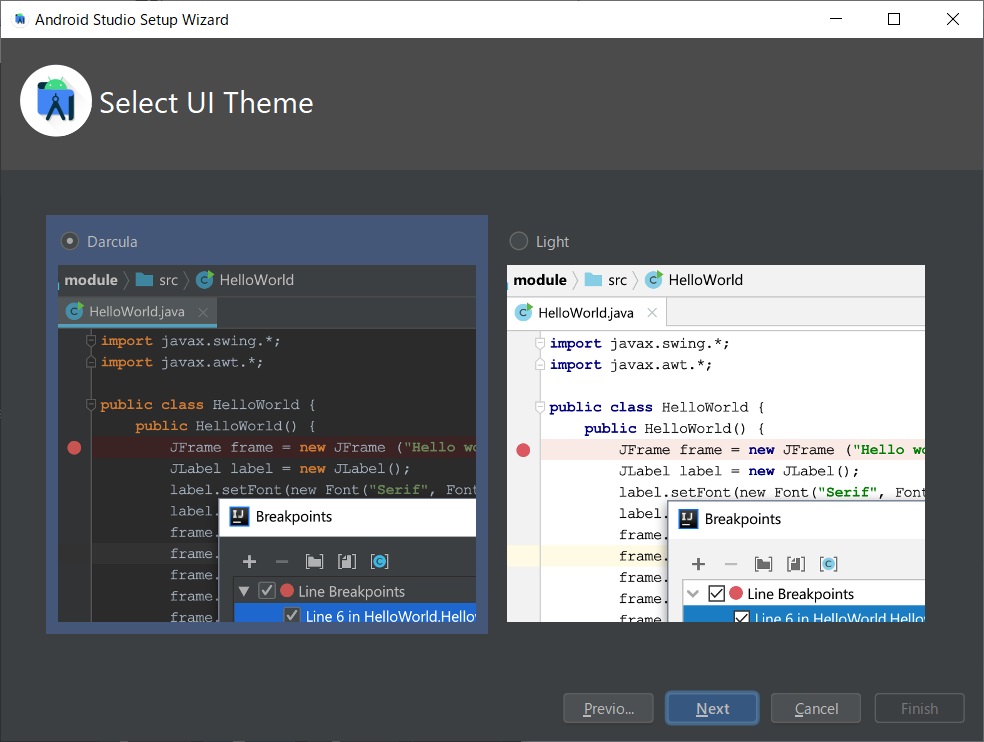
⑤ エディタのテーマを2種類から選択します。 選択後 Next をクリック。
⑥ 設定の確認が表示されます。 Next をクリック。
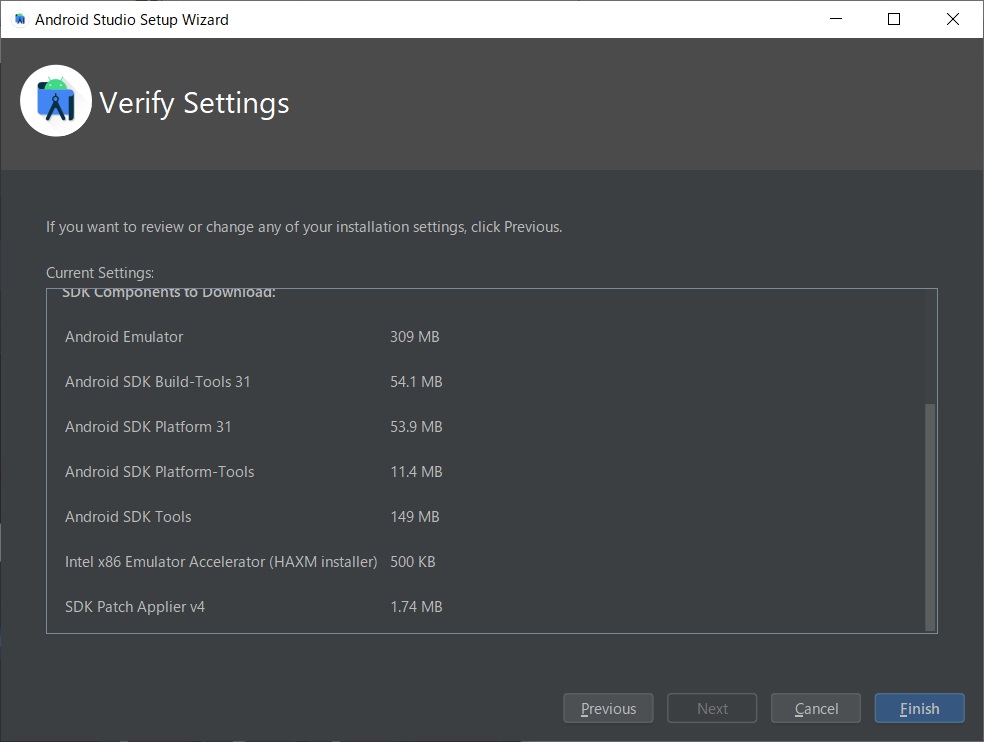
⑦ ダウンロードが開始されます。
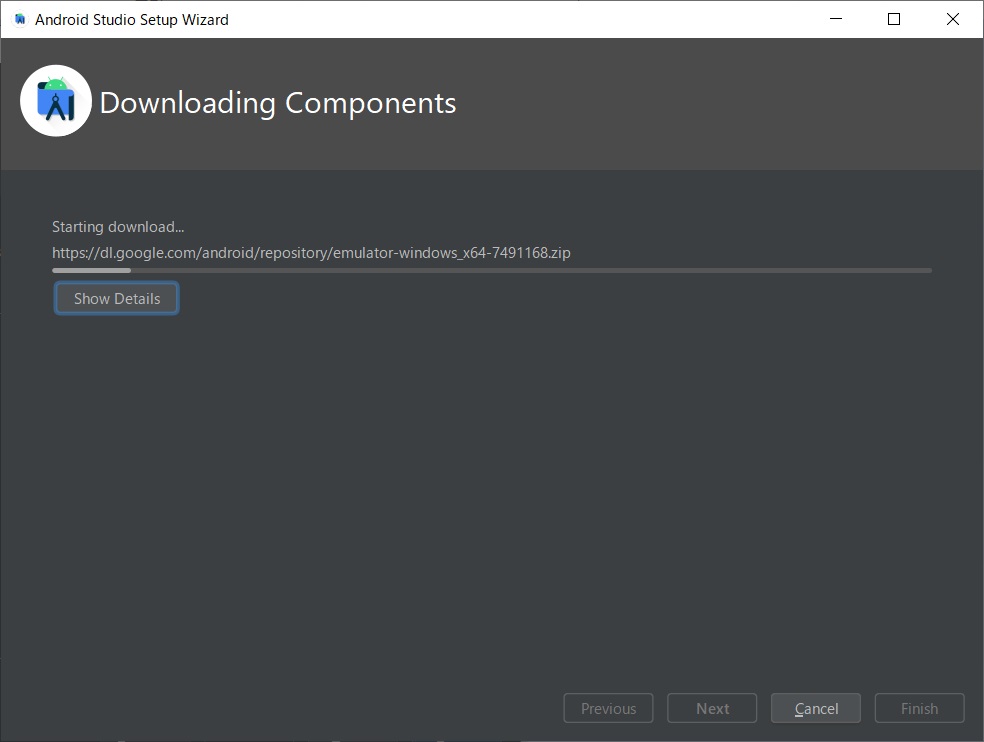
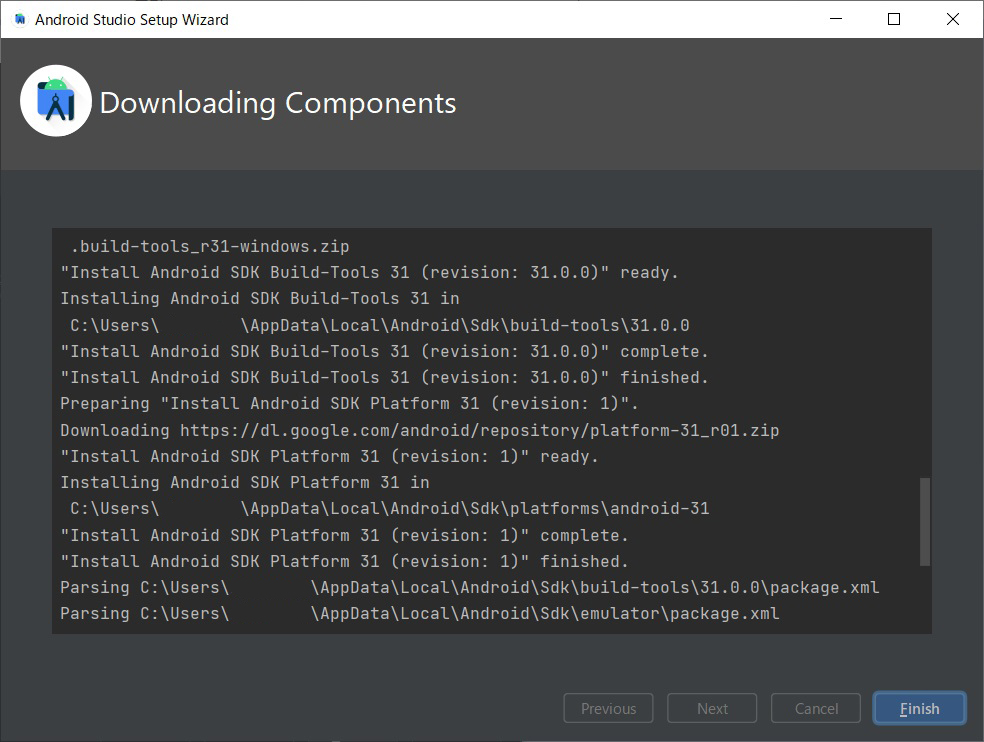
⑧ ダウンロードが完了したら、 Finish をクリック。
⑨ Android Studio の設定が完了しました。 しかし、Flutterを使うためには、さらにプラグインが必要です。
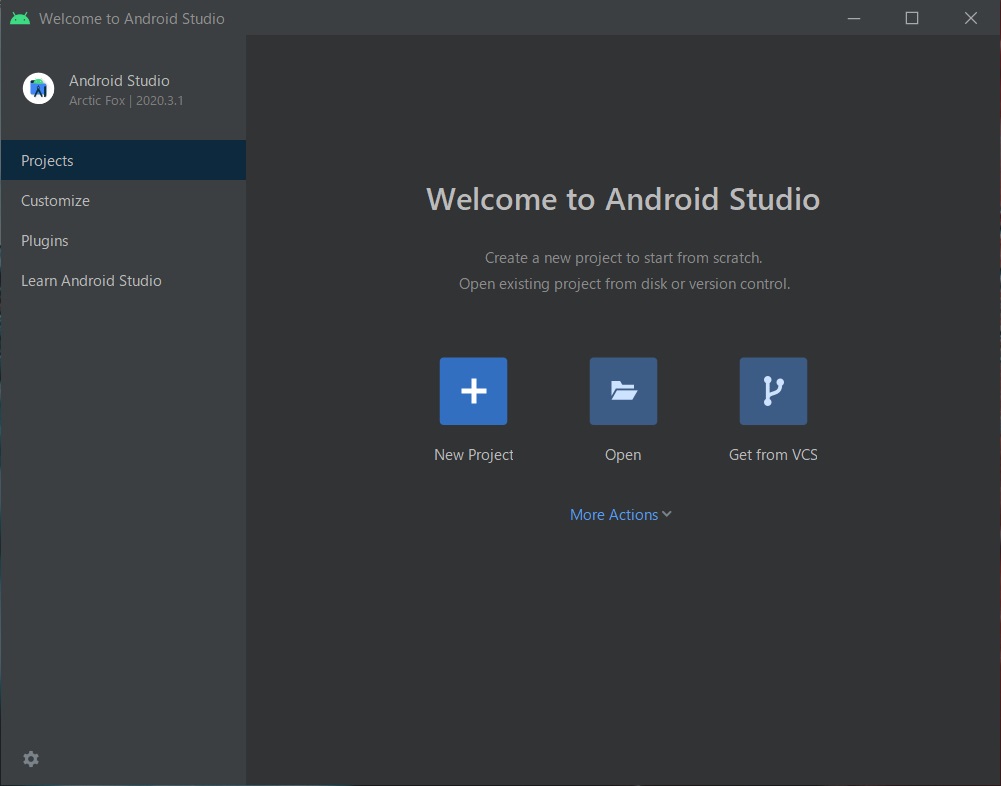
Plugin セットアップ
① 左のペインから Plugin を選択すると、右側に各種プラグインが表示されます。 その中から Flutter を探してインストールしましょう。
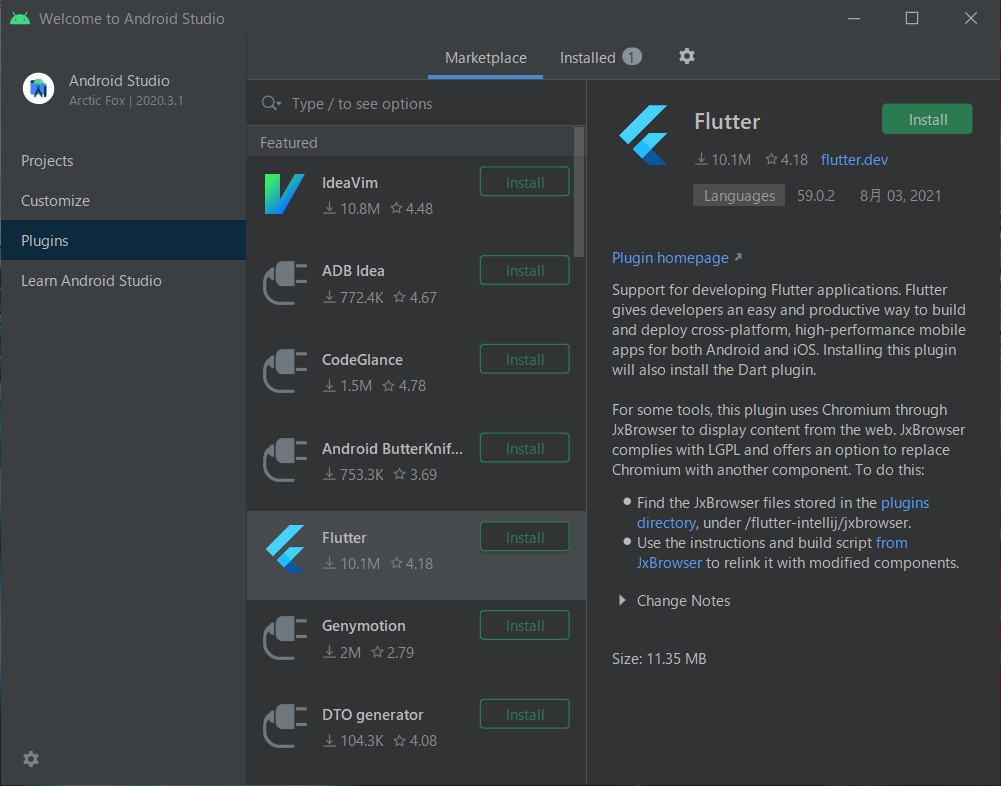
② サードパーティのプラグインのプライバシーに関する注意 が表示されるので、 Accept をクリック。

サードパーティのプラグインを使用すると、個人データを処理するプラグインベンダーが呼び出される場合があります。
個人データ処理の詳細については、プラグインベンダーのドキュメントを確認してください。
JetBrainsは、サードパーティのプラグインベンダーによる個人データの処理について責任を負いません。
③ Flutterプラグインは Dartプラグインが必須なので、一緒にインストールしましょう。 Install をクリック。

④ インストールが完了すると、IDE(Android Studio)を再起動するようにと言われます。 Restart IDE をクリック。
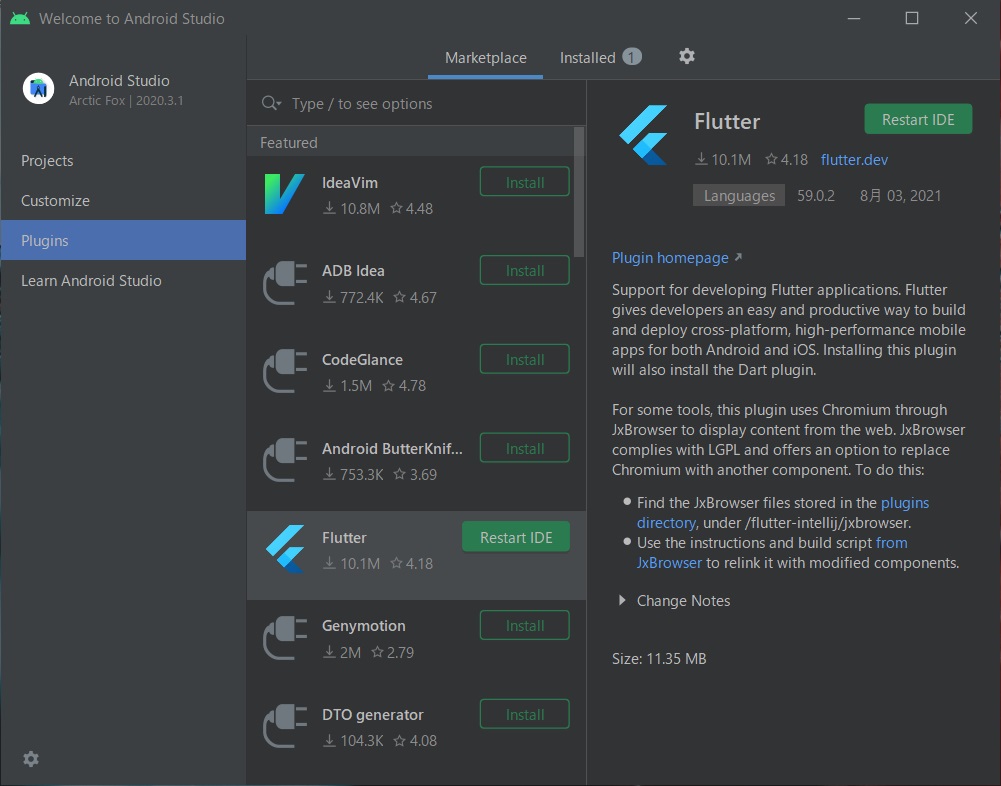
⑤ 再起動の確認メッセージが表示されるので、 Restart をクリック。

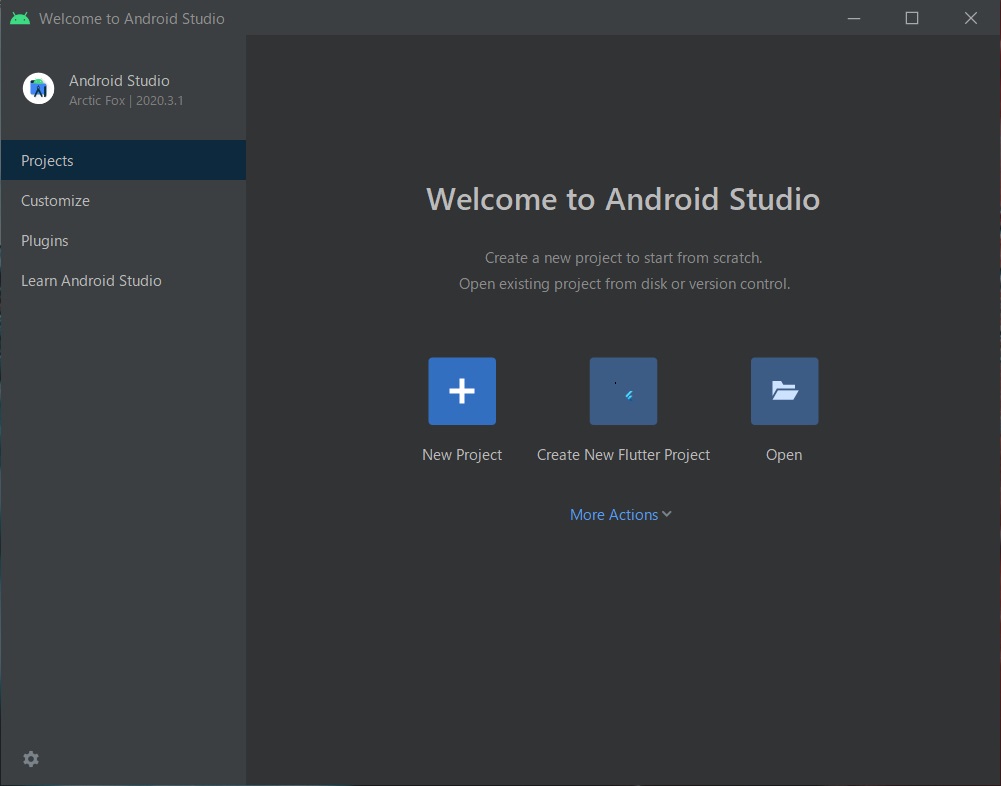
⑥ 再起動が完了すると、真ん中のアイコンに Create New Flutter Project が表示されれば完了です。
flutter doctor で状態の確認
一通りセットアップが完了したところで、 flutter doctor を実行してみましょう。
Microsoft Windows [Version 10.0.19042.1165]
(c) Microsoft Corporation. All rights reserved.

C:\flutter>flutter doctor
Doctor summary (to see all details, run flutter doctor -v):
[√] Flutter (Channel stable, 2.2.3, on Microsoft Windows [Version 10.0.19042.1165], locale ja-JP)
[!] Android toolchain - develop for Android devices (Android SDK version 31.0.0)
    X No Java Development Kit (JDK) found; You must have the environment variable JAVA_HOME set and the java binary in
      your PATH. You can download the JDK from https://www.oracle.com/technetwork/java/javase/downloads/.
[√] Chrome - develop for the web
[!] Android Studio (not installed)
[√] Connected device (2 available)

! Doctor found issues in 2 categories.
Android toolchain と Android Studio に [!] がついています。
Android Studio エラーの解消
Android Studioのエラーは、Android Studioをインストールしたことで解消されているはずです。 ですが、最近のFlutter doctorではAndroid Studioをインストールしてもエラーが消えないのです。 エラーを解消するために以下の作業を行います。
① Android Studio の認識をさせるために、コマンドプロンプトから以下のコマンドを実行します。
> flutter config --android-studio-dir="C:\Program Files\Android\Android Studio"
Setting "android-studio-dir" value to "C:\Program Files\Android\Android Studio".

You may need to restart any open editors for them to read new settings.Flutter がインストールしたAndroid Studioの場所が見つけられずエラーとなっているようです(Android Studioのバージョンによってインストール場所が変わってしまっているため)。 そこで、コマンドを使って直接Flutterに教えてあげましょう。
② flutter doctor を実行します。
> flutter doctor
Doctor summary (to see all details, run flutter doctor -v):
[√] Flutter (Channel stable, 2.2.3, on Microsoft Windows [Version 10.0.19042.1165], locale ja-JP)
[!] Android toolchain - develop for Android devices (Android SDK version 31.0.0)
    X Android license status unknown.
      Run `flutter doctor --android-licenses` to accept the SDK licenses.
      See https://flutter.dev/docs/get-started/install/windows#android-setup for more details.
[√] Chrome - develop for the web
[√] Android Studio
[√] Connected device (2 available)

! Doctor found issues in 1 category.
Android Studioのエラーが解消されました。 そして、Android toolchain のメッセージも変わりました。
Android ライセンスの有効化
① flutter でAndroidライセンスを適用するためのコマンド(flutter doctor –android-licenses)を実行します。 全部で6つのライセンスに承認(y)を入力します。
> flutter doctor --android-licenses
6 of 7 SDK package licenses not accepted. 100% Computing updates...
Review licenses that have not been accepted (y/N)? y
…
1/6: License android-googletv-license:
…
Accept? (y/N): y

2/6: License android-sdk-arm-dbt-license:
…
Accept? (y/N): y

3/6: License android-sdk-preview-license:
…
Accept? (y/N): y

4/6: License google-gdk-license:
…
Accept? (y/N): y

5/6: License intel-android-extra-license:
…
Accept? (y/N): y

6/6: License mips-android-sysimage-license:
…
Accept? (y/N): y
All SDK package licenses accepted
以下のようなエラーが発生したときには、Android Studio で不足しているSDKがあります。
解決方法は、flutter doctor –android-licensesでjava.lang.NoClassDefFoundErrorが発生 を参照。
> flutter doctor–android-licenses
Exception in thread “main” java.lang.NoClassDefFoundError: javax/xml/bind/annotation/XmlSchema
at com.android.repository.api.SchemaModule$SchemaModuleVersion.(SchemaModule.java:156)
at com.android.repository.api.SchemaModule.(SchemaModule.java:75)
at com.android.sdklib.repository.AndroidSdkHandler.(AndroidSdkHandler.java:81)
at com.android.sdklib.tool.sdkmanager.SdkManagerCli.main(SdkManagerCli.java:73)
at com.android.sdklib.tool.sdkmanager.SdkManagerCli.main(SdkManagerCli.java:48)
Caused by: java.lang.ClassNotFoundException: javax.xml.bind.annotation.XmlSchema
at java.base/jdk.internal.loader.BuiltinClassLoader.loadClass(BuiltinClassLoader.java:581)
at java.base/jdk.internal.loader.ClassLoaders$AppClassLoader.loadClass(ClassLoaders.java:178)
at java.base/java.lang.ClassLoader.loadClass(ClassLoader.java:522)
… 5 more
② flutter doctor を実行します。
> flutter doctor
Doctor summary (to see all details, run flutter doctor -v):
[√] Flutter (Channel stable, 2.2.3, on Microsoft Windows [Version 10.0.19042.1165], locale ja-JP)
[√] Android toolchain - develop for Android devices (Android SDK version 31.0.0)
[√] Chrome - develop for the web
[√] Android Studio
[√] Connected device (2 available)

• No issues found!
全ての項目にチェックがついていれば完了です。 開発を始めましょう。
![[flutter] flutterの開発環境を作る【Android Studio + windows】](https://monlog.jp/tech/wp-content/uploads/2021/08/monlog-tech-eyecatch-p533.jpg)